Fabella Creator was made to be simple enough to just pick up the tool and have a project published in only a few steps. When you open Fabella Creator, we want to make sure you know where to look to find what you need. This tutorial will walk you through the menus you’ll find so that you don’t need to waste a minute of creating.
The Projects Dashboard
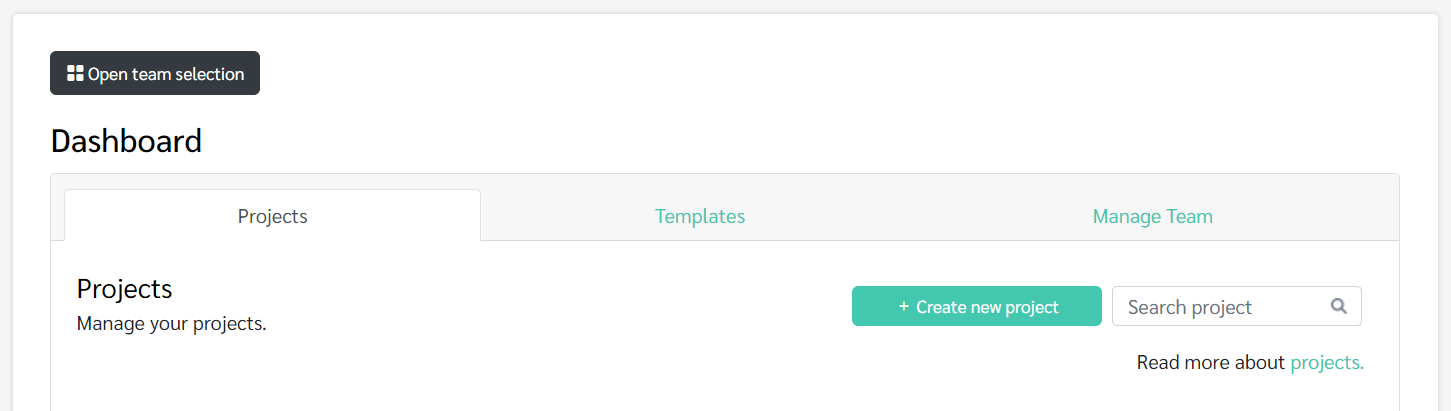
When you first sign in to Fabella Creator, the Projects dashboard is the first thing you’ll find. This is your starting point for managing projects. Here’s what you can do:
- Open Team Selection: If you’re a part of multiple teams, this is where you can find and access any one of them.
- Templates: Access your own private templates, or take a look at the pre-built templates that Fabella Creator offers for an array of project types.
- Manage Team: This is where you can manage the people on your team or their access status.
- Create New Project: Create a new project by providing a name, description, and selecting the project type (audiobook or interactive audio experience). Once created, the project will appear on your dashboard.
- Search Project: Search and open existing projects. You can sort your projects by list or icon view and search by project name. Sorting options include “Latest” and “Name,” making it easier to locate specific projects.
The Help Menu
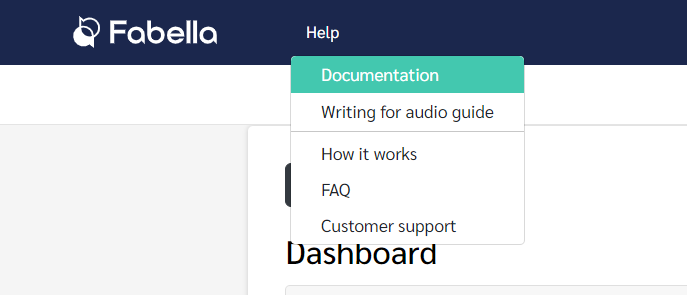
The Help menu is your go-to resource for support and documentation:
- Documentation: Access the FAQ and other instructional materials directly from this option.
- Writing for Audio: A guide on best practices for writing audio content, including tips on word count, timing, and code snippets for managing pauses and breaks in audio.
- How It Works: An introduction to Fabella Creator, providing a basic overview of its functionalities.
- FAQ: Find answers to common questions about using Fabella Creator.
- Customer Support: Contact the support team via email. Support is available 24/7, but response times may vary depending on the caseload.
The User Account Menu
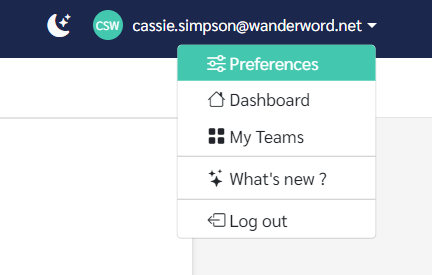
The User Account Menu (accessible by clicking next to your name) allows you to manage your account settings and navigate between different areas of the platform:
- Preferences: Change the look and feel of Fabella Creator to your liking by adjusting settings like the curve of your lines when connecting nodes, using a dark theme or light theme, or whether or not you see tips from Fabella.
- Dashboard: Return to the main dashboard where all your projects are listed.
- My Teams: Manage teams you’re part of, create new teams, or customize existing teams. This feature is useful for collaborative projects.
- What’s new: Take a look at the latest updates to Fabella Creator.
- Log Out: Sign out of your current session.
Navigating Inside a Project
The File Menu
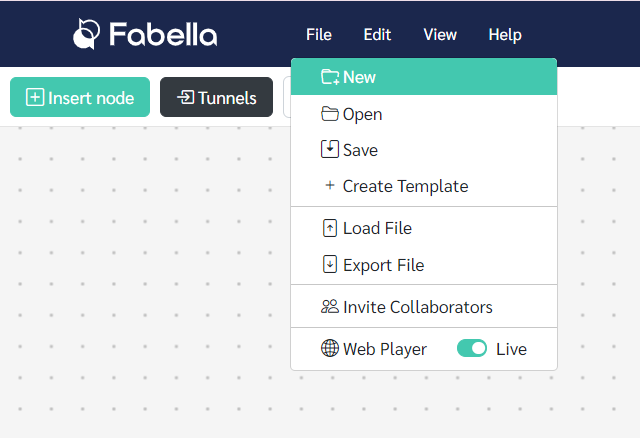
Once you open a project, you’ll notice some additional options within the File menu specific to that project:
- New: Start a new project if needed.
- Open: Reopen an existing project without leaving your current session.
- Save: Save the current project status.
- Create Template: Instantly create a template out of your current project’s set up, which will be saved to the Templates section of the Projects dashboard.
- Load File: Import external files into your current project.
- Export: Export the project for sharing or backup purposes.
- Invite Collaborators: Manage team members within the project.
- Web Player: Publish your project by going live with the web player.
The Edit Menu
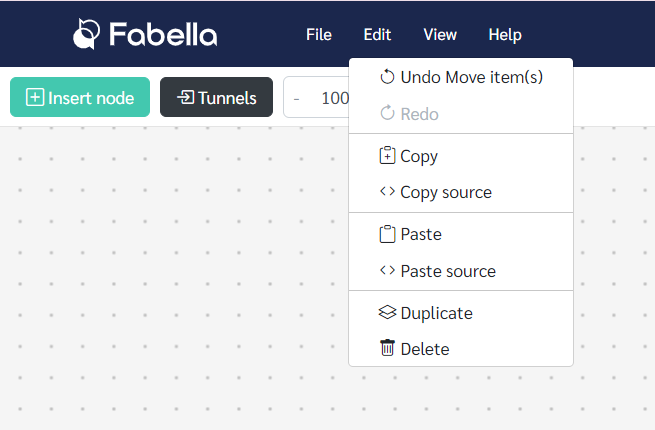
The Edit menu offers tools to streamline your workflow:
- Undo and Redo: Easily fix any mistakes made by undoing or redoing.
- Copy: Copy selected elements within the project workspace.
- Copy Source: Copy source code from your project.
- Paste: Paste the copied elements, creating duplicates within your project.
- Paste Source: Paste source code into your project.
- Duplicate: Quickly duplicate elements without needing to copy and paste manually.
- Delete: Remove selected elements from your project.
These tools are particularly useful when dealing with repetitive tasks or when you need to make multiple copies of a node or element.
The View Menu
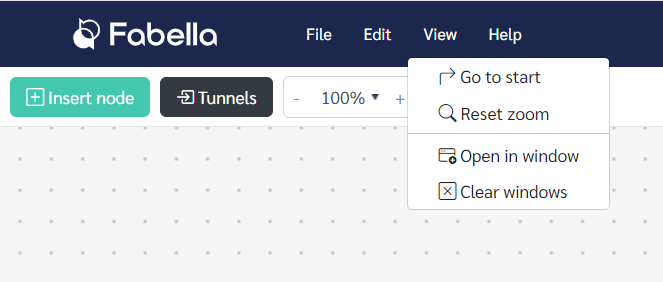
The View menu helps you manage how your workspace is displayed:
- Go to Start: Center the start node on your workspace.
- Reset Zoom: Return the workspace zoom level to 100%.
- Open in Window: Open selected elements in a separate window for focused editing.
- Clear Windows: Close all open windows within the project workspace.
Final Tips and Support

At any point, if you encounter issues or need additional support, remember that the Help menu is always available with documentation, writing guides, and customer service options. For feedback or to report a problem, use the “Report a Problem” or “Give Feedback” options to reach out to the support team.